Database architecture
This page is in active development, some content may be inaccurate.
Model
At a high level the database model can be described in the image bellow.
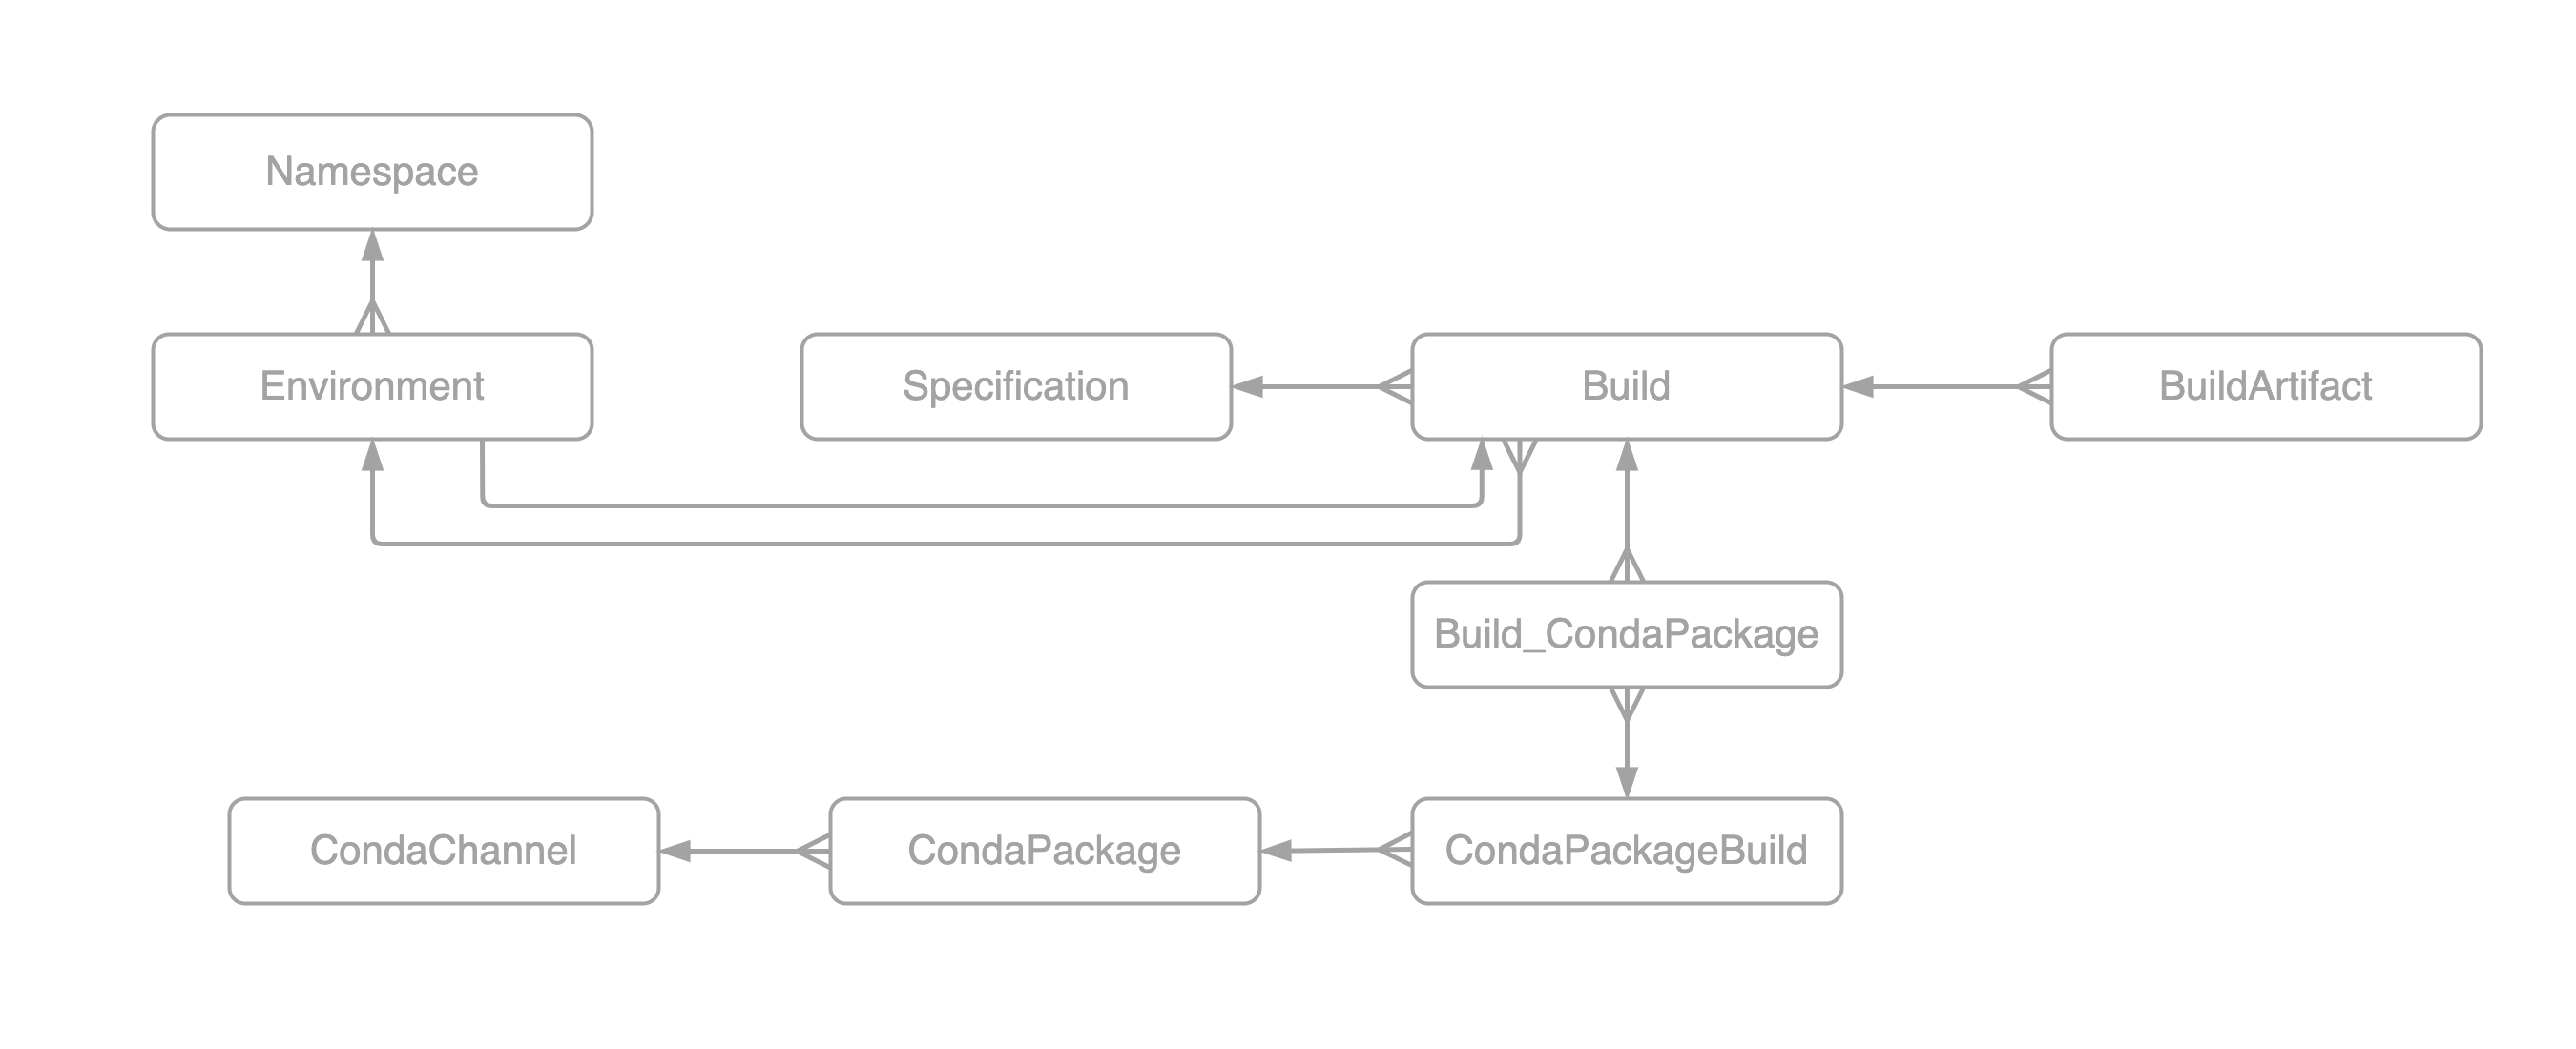
Important things to note about the relationship:
- An
environmentexists within a givennamespaceand always has a currentbuild - A
buildbelongs to a particularenvironmentand has associatedcondapackageandbuildartfacts - A
buildartifactis a way for the database to keep track of external resources for example s3 artifacts, filesystem directories, etc - A
condapackageis a representation of a given Conda package which belongs to a givencondachannel - A
specificationis the environment.yaml using inconda env create -f <environment.yaml>
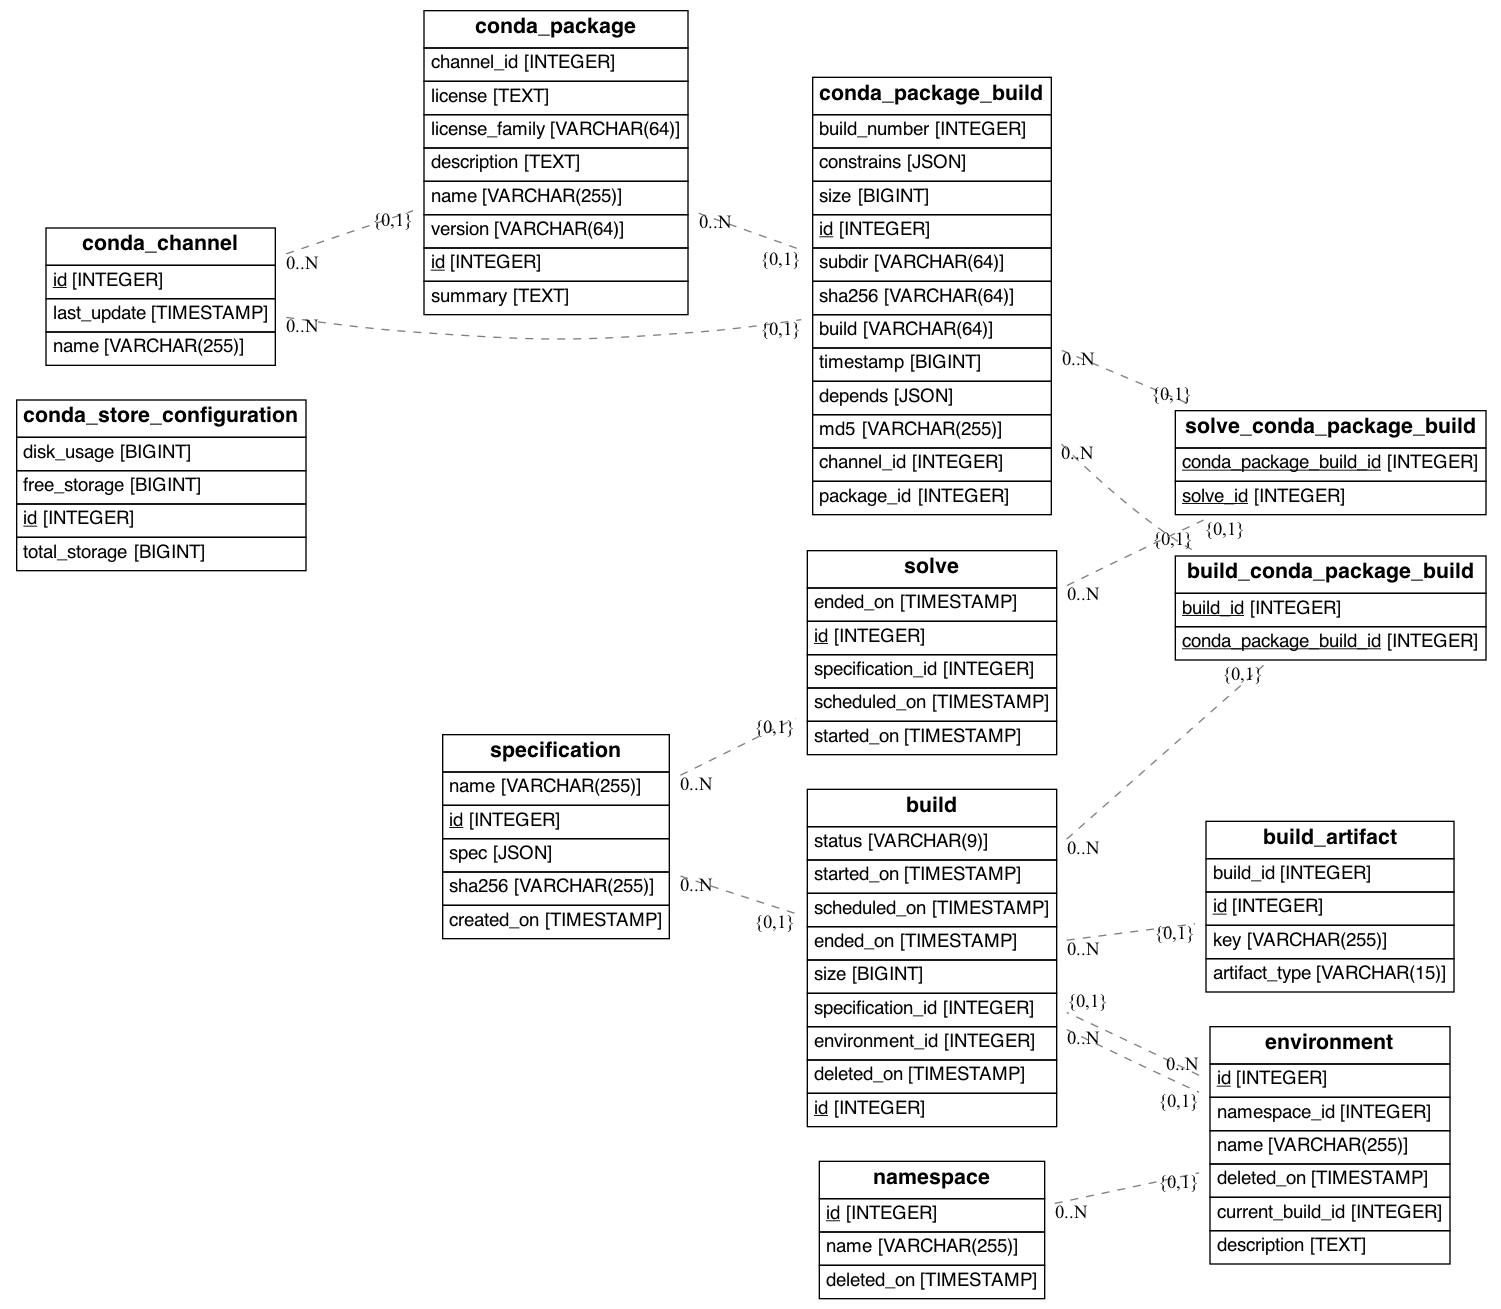
The following will generate the database model shown bellow. It was
generated from the examples/docker example. You'll see in the
command that we are excluding several tables. These tables are managed
by celery.
pip install eralchemy  # not available on conda-forge
eralchemy -i "postgresql+psycopg2://admin:password@localhost:5432/conda-store"  \
    -x celery_tasksetmeta celery_taskmeta kombu_queue kombu_message alembic_version \
    -o output.png
Migrations
conda-store relies on SQLAlchemy for ORM mapping, and on Alembic for DB migrations.
The procedure to modify the database is the following :
- First, modify the ORM Model according to the changes you want to make
- edit the file
conda-store-server/alembic.iniand replace the value for entrysqlalchemy.urlto match the connection URL of your database.
For example (when postgres was started via docker-compose):
script_location = alembic
sqlalchemy.url = postgresql+psycopg2://postgres:password@localhost:5432/conda-store
- in your command line, run the following :
cd conda-store-server/conda_store_server
alembic revision --autogenerate -m "description of your changes"
-
You should have a new file in
conda-store-server/conda_store_server/alembic/versions/. Review it thoroughly. It contains thealembicoperations (op) to actually modify the database, either when upgrading (upgradefunction) or downgrading (downgrade) -
You can migrate your data within these
upgrade/downgradefunctions, for example :
from alembic import op

# revision identifiers, used by Alembic.
revision = 'abcdef01234567'
down_revision = '987654321f0edc'
branch_labels = None
depends_on = None

def upgrade():

    # operations to modify the database structure
    # ...
    op.create_table(
        'new_table',
        Column('id', INTEGER, primary_key=True),
        Column('field1', VARCHAR(50), nullable=False),
        Column('field2', INTEGER),
        Column('timestamp', TIMESTAMP, server_default=func.now())
    )
    # ...

    op.execute('''INSERT INTO new_table (field1, field2)
                  SELECT field1, field2
                  FROM old_table''')

    # other operations to modify the database structure
    # ...


def downgrade():

    op.drop_table('new_table')
- Once you're sure about the changes generated, you can apply them by running :
alembic upgrade head
- Check your database : your changes should be reflected. If not, refer to Alembic's documentation.